Creating a Page - Step by step guide
Greetings! If you find the process of creating a page intimidating, here's a step by step guide on how to make one.
Creating An Account
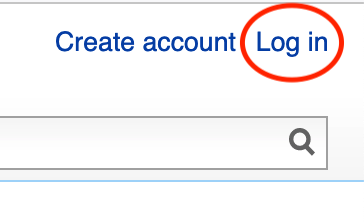
First, you'll need an account on the wiki. You can go to the Log In Link at the top of the page.
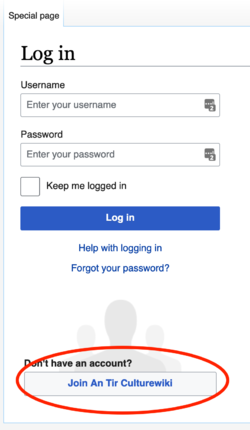
This will take you to a login dialog, which will include the link to create an account.
Select the Join An Tir Culturewiki button, and enter your information to create an account. You'll need to wait 24 hours after you confirm it for the account to gain editing privileges.
Logging Into the Wiki
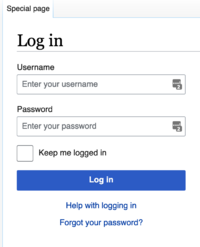
Once you have created an account (and waited a day), you can return back to the login link, click it, and enter in your username and password.
Select the login button, and you should be back at the main page, but see your name at the top.
Towards the bottom of the main page is a link to the sandbox page. Click it.
Editing the Sandbox to Create a Page Link
You'll then be taken to the (likely very blank) Sandbox page. You'll want to select the Edit link near the top.
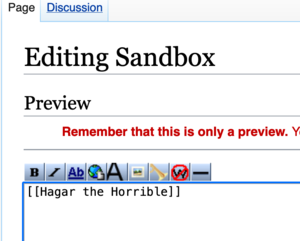
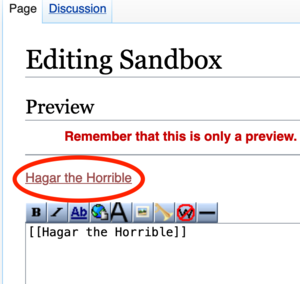
Now, you should be at the page edit screen, with a large text entry field. You'll need to decide on a name for your page – for a personna page, most people just use their SCA name. You'll want to enter it, surrounded by double brackets.
In this example, my page will be "Hagar the Horrible". The double brackets let the wiki know it should a link to another page, and not just plain text.
After you type in your page (and the brackets), you'll want to select the Show Preview button at the bottom of the page.
If you accidentally hit the save button, that's OK - the Sandbox page gets cleaned up regularly. We don't need to actually save it, we just want to get a preview that has the "live" link to the page. You should now see it in the Preview section near the top of the page.
If everything has gone as expected, the text should appear as a red link with an underscore. Links are red when the link doesn't lead to a preexisting page, as the page has not yet been created.
Creating and Saving a Wiki Page
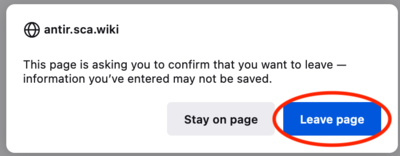
Now, you can click on the link to your page (in the preview). You will get a warning dialog asking if you really want to leave the page, as your changes (to the Sandbox) haven't been saved. You only needed the preview link, so it's OK to select Leave Page.
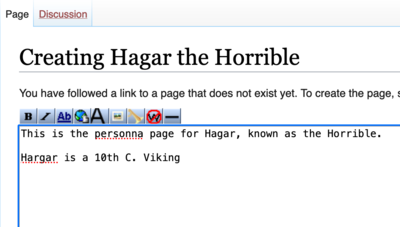
This should take you to your new page, which will be blank. Note that until you save some content for this page, it won't actually be created. So, let's add some text.
Just click in the large text box, and start typing – in this case, a description of your persona. In the example, I've written a few lines about Hagar.
Don't worry too much about formatting, making it look fancy, or the like. I've made a few spelling mistakes, but we won't worry about them now. The idea here is just to get an entry created – you can always edit it again later!
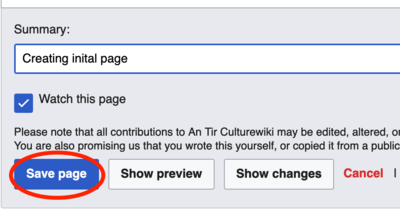
When you are done entering text, scroll down and hit the Save button.
Optional: You can also fill in a little text in the Summary field to describe what the edit is about. This helps the admins (or others) see what you were up to. The Watch this page checkbox isn't too important - it just highlights the page for your account when looking at the Recent Changes page. You can leave it checked.
Viewing the Completed Wiki Page
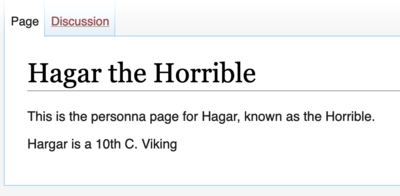
Once you've hit the Save button on your page, you should now see the completed page.
When you want to add more to it (or remove things), format it, correct spelling, or otherwise change it, you can go back to the page later and select the Edit button. Keep in mind, the wiki is very collaborative, and anyone can edit most any page – even your own persona page. Don't worry, it's easy to change it back, or modify it again. It's normal for many folks to edit a single page - adding content, formatting, making corrections, and the like.
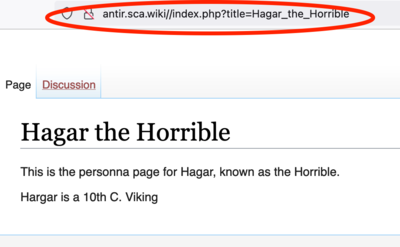
You might notice that the page has a specific URL (web page address) shown in your browser's URL navigation bar. The main difference will be that it will have underscores in place of spaces, as spaces (and certain other characters) aren't allowed in a URL.
Final Thoughts
That's it! You've just created your first wiki page. Note that to find it again, you'll want to search the wiki for the name of the page (or any keyword used in the page title, or the page itself). However, unless someone else does the same, it will be hard for others to find it or stumble across it. Therefore, it can be useful to link to it in various ways. I won't show the details here – the information is available on other help pages – but suggestions would include:
- Add categories to the page - things like Squire, Aqua Terrain, Clan Carn. Category links indicate the page belongs to that category.
- Edit related pages and add in your page as a link. For a persona page, it would be normal to link your name if it appeared on an event page, or a regional page, for example.
- Add a redirect from your Account page (which is automatically created from your username) to you persona page.
You can also take a look at other pages in the wiki (including other persona pages). If you see something you like (say, in the layout or formatting), you can hit Edit on that page, and take a look at the edit text field to see how it was made. You can even copy and paste bits back to your page. Just don't save when doing this if you don't mean to make changes to the page you are viewing.
